Mathematical Typesetting in InDesign with LaTeX and Sidekick
Getting mathematical notation into InDesign has always been painful. You either use equation editors with limited output options, manually convert formulas to images, or resort to workarounds that never quite look right. But if your equations are written in LaTeX—the standard for academic and technical publishing—Claude can now convert them to crisp vector graphics and place them directly into your InDesign layouts.
Watch It in Action
From LaTeX to SVG to InDesign
The key insight is that LaTeX formulas can be converted to SVG—scalable vector graphics that look sharp at any size. In this example, Claude uses the math-svg-mcp server to handle this conversion, then places the resulting graphics into InDesign through Sidekick.
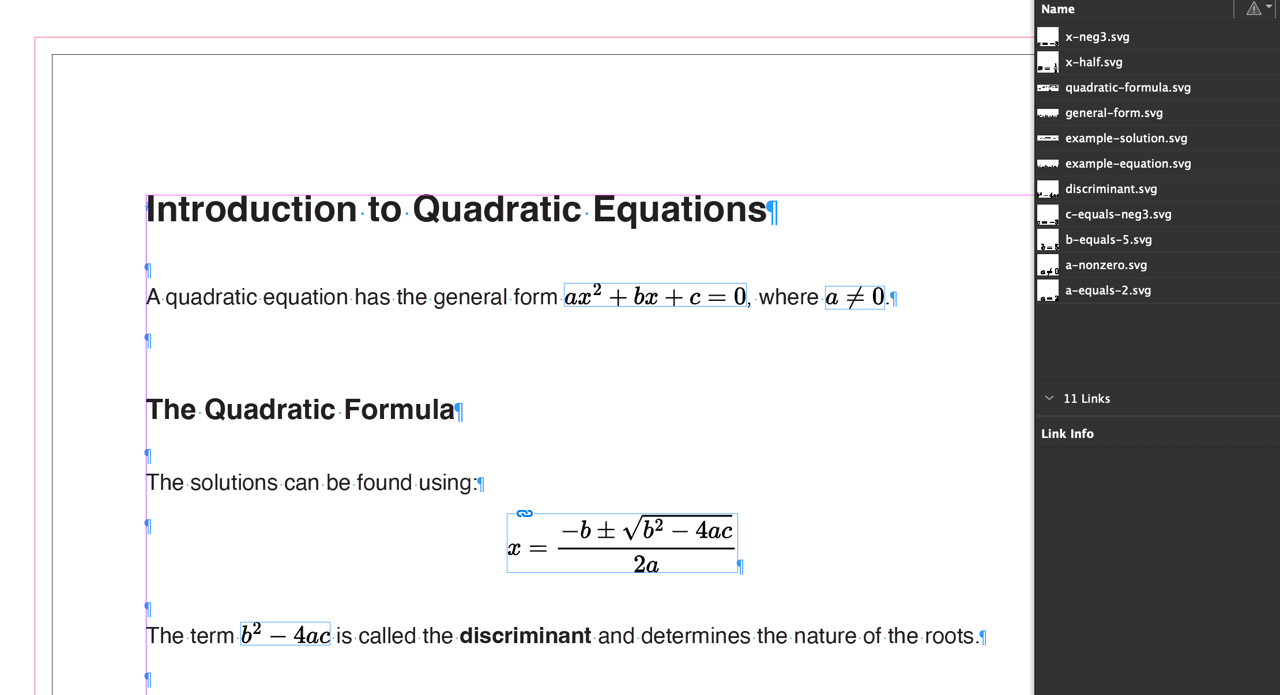
Here’s a formula in LaTeX notation:
$$x = \frac{-b \pm \sqrt{b^2 - 4ac}}{2a}$$Claude converts this into an SVG image:
This SVG is a vector graphic—it stays crisp whether you’re viewing it on screen or printing at 300 dpi. Claude then places it into InDesign as an anchored object that flows with your text.
The Baseline Problem
Display formulas (centered on their own line) are straightforward to place. But inline formulas—equations that appear within a sentence, like “where $a \neq 0$“—need special handling. The formula’s baseline must align with the text baseline, or the math will look like it’s floating above or sinking below the line.
Claude solves this by relying on the fact that math-svg-mcp not only returns the image and image dimensions, but also the depth—the distance from the baseline to the bottom of the formula. It uses this depth value to set the vertical offset of inline formulas in InDesign, ensuring proper baseline alignment.
How It Works
When you ask Claude to place a document with LaTeX formulas, it follows this process:
- Extract formulas: Identifies all
$...$(inline) and$$...$$(display) formulas in your source text - Convert to SVG: Each formula is rendered at the correct point size, matching your body text
- Replace with placeholders: The LaTeX code is replaced with markers like
{{quadratic-formula.svg}} - Place text in InDesign: The processed text goes into a text frame
- Insert formula graphics: Each placeholder is replaced with its corresponding SVG
- Align baselines: Inline formulas are offset using the depth value so they sit properly on the text baseline
The result is properly typeset mathematics that flows naturally with your text.
Scaling to Entire Books
This workflow shines when you have lots of equations. A single chapter might have dozens of formulas; a textbook might have hundreds. Manually converting and placing each one would take hours. With Claude and Sidekick, you describe what you want and the conversion happens automatically.
The approach also maintains a clean separation between source and output. Your original files with LaTeX notation stay untouched, while the generated SVGs and InDesign documents live in separate folders. If you need to regenerate everything—say, at a different point size—you can do so without losing your source material.
Requirements
To use this workflow, you’ll need:
- Adobe InDesign with Sidekick plugin installed
- Claude Code or Claude Desktop
- The math-svg-mcp server (for LaTeX-to-SVG conversion)
- Source files with LaTeX notation (
$...$for inline,$$...$$for display)
The math-svg-mcp server uses MathJax to render LaTeX formulas as SVG, and returns the depth value needed for baseline alignment. Once it’s configured in Claude, Claude handles the coordination—reading your source files, converting formulas, and placing everything in InDesign.
Try It Yourself
The sidekick-math repository contains everything you need to try this workflow: example source files with LaTeX notation, the generated SVGs, and a CLAUDE.md file with detailed instructions for Claude. Clone the repo and point Claude Code at it to see the workflow in action.
A Note on Claude Cowork
The example in this post uses Claude Code, which might feel like a steep learning curve for some. The key requirement is that Claude needs access to your files and directories to read your source documents, write out the generated SVGs, and coordinate the workflow.
Claude Cowork now offers this same file system capability. In theory, it should be able to perform this workflow just as well. In practice, Cowork is still catching up—it’s slower, less accurate, and currently doesn’t seem to respect instructions in a CLAUDE.md file (where we provide detailed guidance on how to perform the task). If you’re comfortable with command-line tools, Claude Code remains the more reliable option for now. That said, the combination of Claude Cowork and Sidekick holds real promise—once Cowork matures, it could bring this kind of automated publishing workflow to a much wider audience without requiring any terminal expertise.